This is a slightly unusual post.
By way of background, a large number of my #LymeRunners group are taking part in this year’s RunUp2Christmas fundraiser for MIND. Whilst quite a few have GPS running watches, not all do. The whole concept of digitally recording a run is totally new to some of the group. As #RU2C is evidenced electronically, I thought I would put together a crash-course in using the free version of Strava on a (relatively recent) smartphone for this purpose. So if you’ve never used Strava yourself, have a look through this and hopefully by the end of the post you’ll know how to use it too.
It’s worth noting that whilst lots of people use Strava, there are several other apps which work in exactly the same way. This isn’t sponsored by Strava, nor am I affiliated with them in any way. I tend to use it because most of the athletes I know also use it. And it’s nice to see who’s getting up to what, as well as a chance for me to look and see what routes people are taking as it’s a way of finding new runs to do myself.
Register an account on Strava
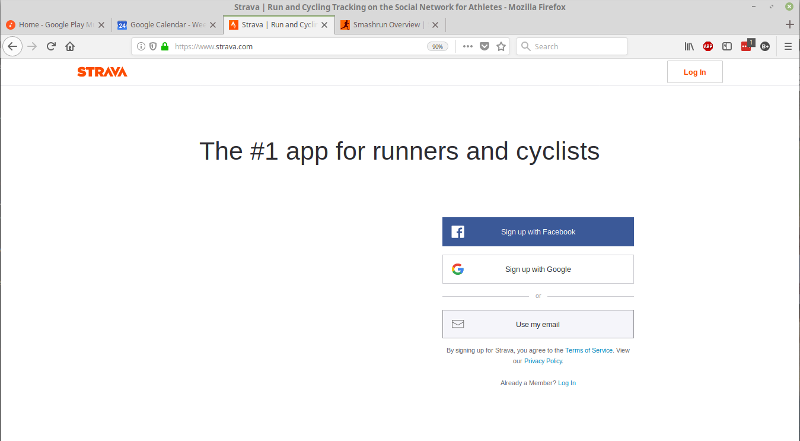
The first step for me was to go to the Strava website on my computer in order to create an account. In fact you can do this on your mobile phone using the app (see below for installing that), but I got stuck in a loop of being unable to get through the security check where you’re selecting specific images from a list, whereas it worked first time using the website on the computer.
So head over to https://www.strava.com and select the option “Use my email”
You’ll then be presented with a form to complete your details. I prefer to do everything via email rather than sharing the information across different social media. Basically I don’t trust Facebook with sharing my data. And likewise Google!
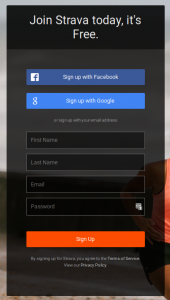
Complete your details
Once you’ve filled this in, you’ll get a confirmation message and it’ll ask you to check your email to verify your account. So, go to your email program and hopefully you’ll have a message from Strava. Just click the button in the email and that should do it:

The verification email
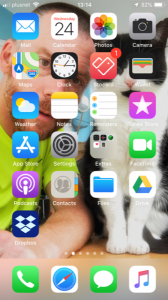
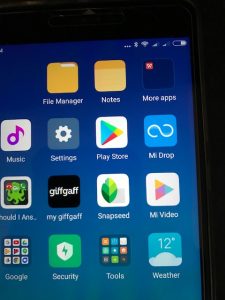
Download the app
Now depending on whether your phone is made by Apple or not, it’ll likely run iOS (Apple) or Android (most other phones). Are windows phones still a thing? I’ve no idea. Anyway, you’ll need to go to the App Store (iOS) or Google Play Store (Android) in order to install the strava app:
Once into the relevant store, do a search for ‘Strava’ and it should come up:
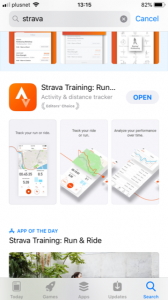
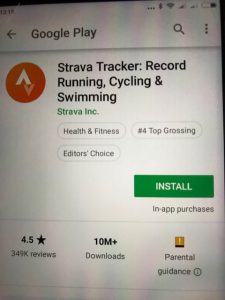
Don’t worry about the ‘in app purchases’. The free version does all the basic tracking but there’s a paid-for option that gives you more metrics that you might use, but probably won’t unless you really like to drill into the data.
Once downloaded, you should find the orange strava logo in your phone apps and you can click it to start the program:
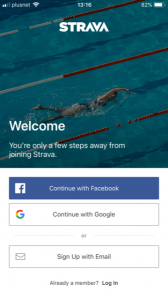
Strava app start screen
As we’ve already created a log-in above, you can go to the ‘Already a member? Log in’ option at the bottom. Of course you could set up your strava account from here alone, but for some reason when I tried it things all went awry! But it should work.
Input your log in details and you should be into the Strava home screen.
But first, a quick aside!
GPS settings
In order to use Strava to track your runs, you’ll need the GPS to be turned on inside your phone. A lot of the time it already is, but it’s worth a check to make sure.
On Android
1. Swipe down from the top of the screen to open your notifications bar (this should work even on the lock screen or if you’re in an app)
2. If you have Quick Settings straight away find and tap on Location or GPS so it is highlighted
3. If not you may need to swipe down again to access Quick Settings.
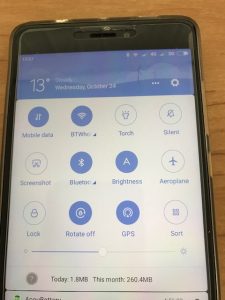
Finding the GPS on Android
On iOS
1. From the home screen, swipe up from the bottom of the screen
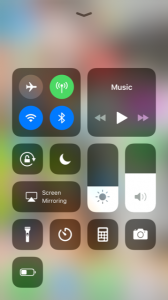
GPS on iOS (it’s the green beacon icon)
OK, that should be the App installed, Strava account created and phone primed and ready to go. That’s really the complicated bit done!
Strava home-screen
Once you’re logged into Strava you’ll get a screen a bit like this:
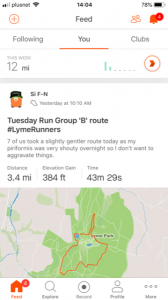
Strava app home screen
To try to explain the screen – let’s start from the top and work line by line:
- the (+) thing is a social media button. I don’t use this at all
- the “friends” icon allows you to search for other users on strava. So if you search for “Si F-N” you’ll see my account appear in the list etc. Works just like Facebook essentially
- the bell icon is a notifications thing to let you know about something. It’s very similar to the bell icon on Facebook.
- You can then chose to see the runs that all the people you are friends with (on Strava) have done, just your own runs, or if you’ve selected a ‘club’ then it’ll show the people who you follow who are members of that club. I’ve selected ‘you’ (i.e. just my runs) for the purpose of this photo
- The big section over most the screen is a ‘news feed’. This will contain the runs that you’ve done and those that your ‘friends’ have done. With GPS maps etc
- The house icon ‘feed’ is this screen
- The magnifying glass allows you to find and join ‘challenges’ and ‘clubs’. Whilst not completely exciting, for the #RU2C project it’ll make things a lot easier to draw together if everyone joins the “December Running Distance Challenge” when it becomes available as this will give you a cumulative total of the runs you have done during December. Here’s what it will look like (it’s only October at the moment but you’ll get the idea)
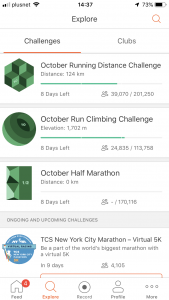
Showing the monthly run distance challenge progress
- The ‘Record’ button is how we start and stop our recording so I’ll come back to that.
- The ‘Profile’ button just gives you some information about your own profile
- The ‘More’ button give you access to further settings. Perhaps the most useful one in there (under settings itself) is the ‘units of measurement’ option. You can choose to see things in miles or kilometers depending on your preference. Of the other options, if you choose to get a GPS watch down the line, you can link it up to your Strava account in here too.
So it’s all very familiar if you use Facebook or other social media options as that’s very much what Strava is trying to be, albeit fitness related.
Recording a run on Strava
So to do this, we click on the ‘record’ button which brings up a new screen:
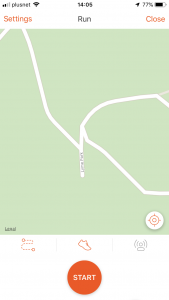
Recording a run
Assuming your GPS is working, you’ll get a blue-dot on the map showing where you are and you should get a message at the top of the screen stating that GPS has been acquired. (In fact if you look in the top right hand corner next to the battery % you’ll be able to see the iOS location services arrow icon displayed, demonstrating Strava is using the GPS). It may take a few seconds to find its position.
Now, as Strava knows I’m a runner, it has already selected that I’m about to go for a run – can you see the shoe icon above the ‘start’ button? If you click that icon it’ll give you a choice of different sports and the appropriate icon will appear there.
Once you’re ready, click start and then go for a run. If it’s the first time you’ve used it it may put up a warning which is essentially to be careful not to get run over etc! Put your phone somewhere safe so you can’t drop it or lose it whilst you’re having a run. And essentially you don’t need to think about the phone any more until you are ready to finish your run.
It’ll look a bit like this, although as you move you’ll start to get a blue GPS trace appearing:
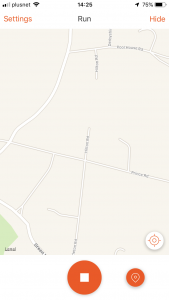
Strava is recording
When you finish your run, you need to press the stop button and you’ll get this screen:

Strava run is paused
This gives you the option to resume your run, or to finish it. Let’s hit finish:
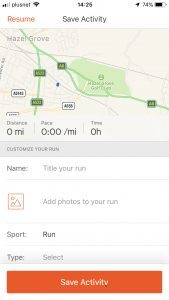
Strava finish screen
What you’ll get is a screen showing your route, the distance, pace, time etc (I was sat by the computer when I was putting this together, hence all the figures are zeros!).
Give the run a name and if you’ve taken any photos whilst out running you can add them to the post. When you’re done, press the big ‘Save Activity’ button to save your run to Strava.
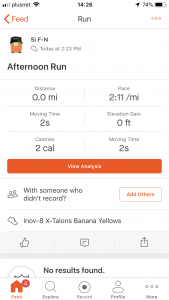
Run is saved
Once you see this screen, you’ll know the run is saved onto Strava. If you click on ‘Feed’ at the top of the screen, it’ll take you back to the home screen of Strava. If you click ‘View Analysis’ it’ll give you a load of information about your run including the hills you’ve run up, the distance you went, and how quick you were going.
Conclusion
Hopefully that’ll get you started in recording your runs. Strava can do a fair few interesting things on top of the basics, but that’s beyond where I want to take this post.
Happy running!
Be the first to comment on "Run up to Christmas – using Strava"